> For the complete documentation index, see [llms.txt](https://help.konnektive.com/llms.txt). Markdown versions of documentation pages are available by appending `.md` to page URLs; this page is available as [Markdown](https://help.konnektive.com/konnektive-crm/admin-setup/plugins/sms/sendplex-sms-plugin.md).
# SendPlex SMS Plugin
## SendPlex Activation
#### Navigate to **Admin** → **Plugins** → **SMS,** select the SendPlex plugin and click on the ***+Activate*** button
#### Enter the **email** and **password** tied to your SendPlex account then hit the ***Connect*** button. (Konnektive will generate the **Sender** (Pool\_Id) and **token** in the Advanced Setup page)
## **SendPlex Advanced Setup**
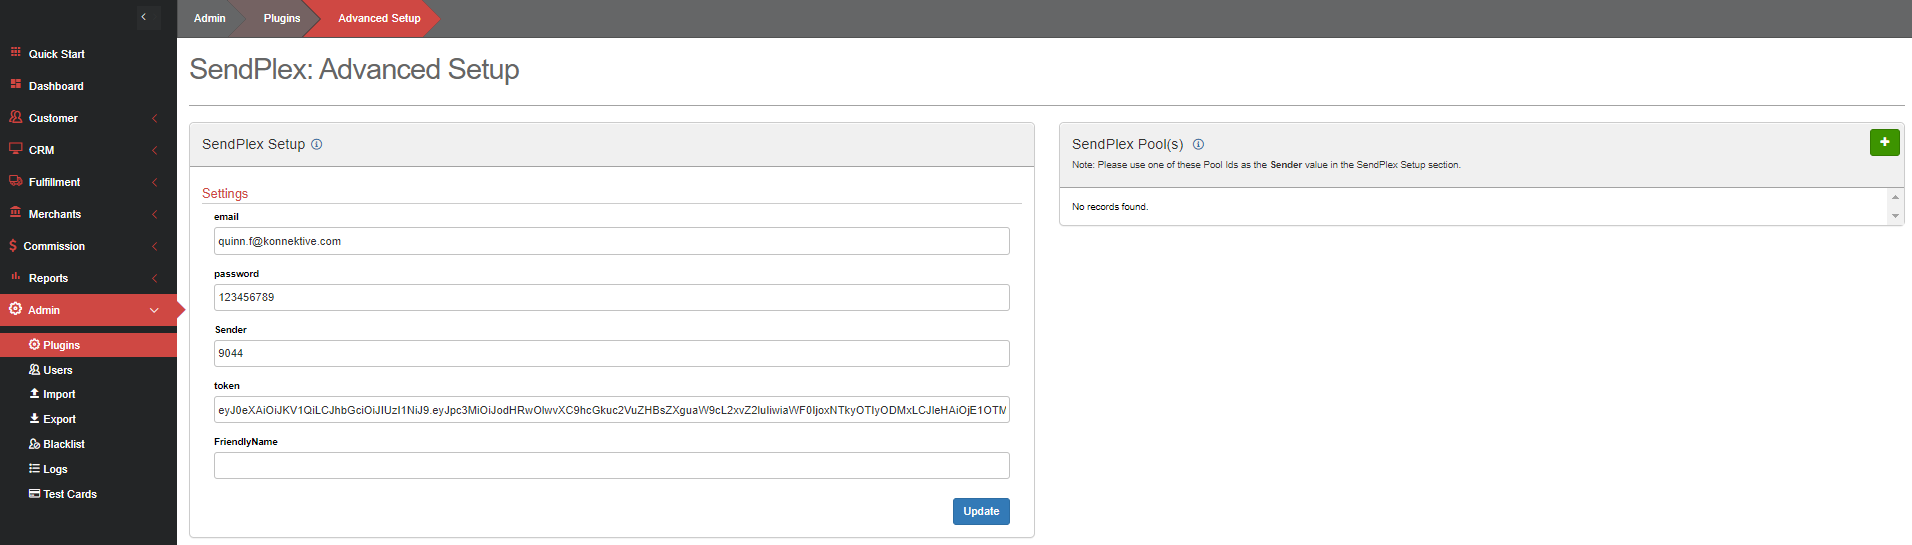
### Before Proceeding make sure your email and password are entered. If they are NOT present, enter them in and hit the ***Update*** button
* Once in the Advanced Setup screen, hit Update or Refresh your page to populate your Sendplex **token**
* The Sendplex Pools section will show you all the PoolIds assigned to your SendPlex account.
* If you click the Green + button, you will generate a new PoolId.
* The **SendPlex Token** and **Sender** values are used to authenticate the API requests tied to your account, it is required these values are present to send SMS messages.
#### This is what the plugin will look like once all the required values are generated
## **Adding SendPlex to a Campaign**
#### Add SMS to a Campaign. Go to **CRM → Campaigns** Scroll down to the **SMS Auto-Responders** section.
#### **See image Below:**
* Click on the **Green Plus Button** to add a **SMS Auto Responder**
* **Event Name-** Select the appropriate Event from the dropdown.
* **Product-** Select the Campaign Product you want to apply it to.
* **Billing Cycle Number-** Pick the Billing cycle # you want the SMS to send on.
* **Validity Period-** This is the amount of seconds SendPlex will attempt to send messages that failed on the first Attempt. After the time elapse it will stop sending the message.
* **Sender -** This drop down will be populated with the **Sender(s)** (SendPlex **pool\_ids**) tied to the SendPlex Plugin(s) activated in your instance. Choose the one you’d like to send on behalf of.
## **Send a Test SMS**
* Click into an existing **SMS Auto Responder** tied to SendPlex.
* To Send a Test SMS. Enter the Phone Number then click the Red **Send Message** Button.